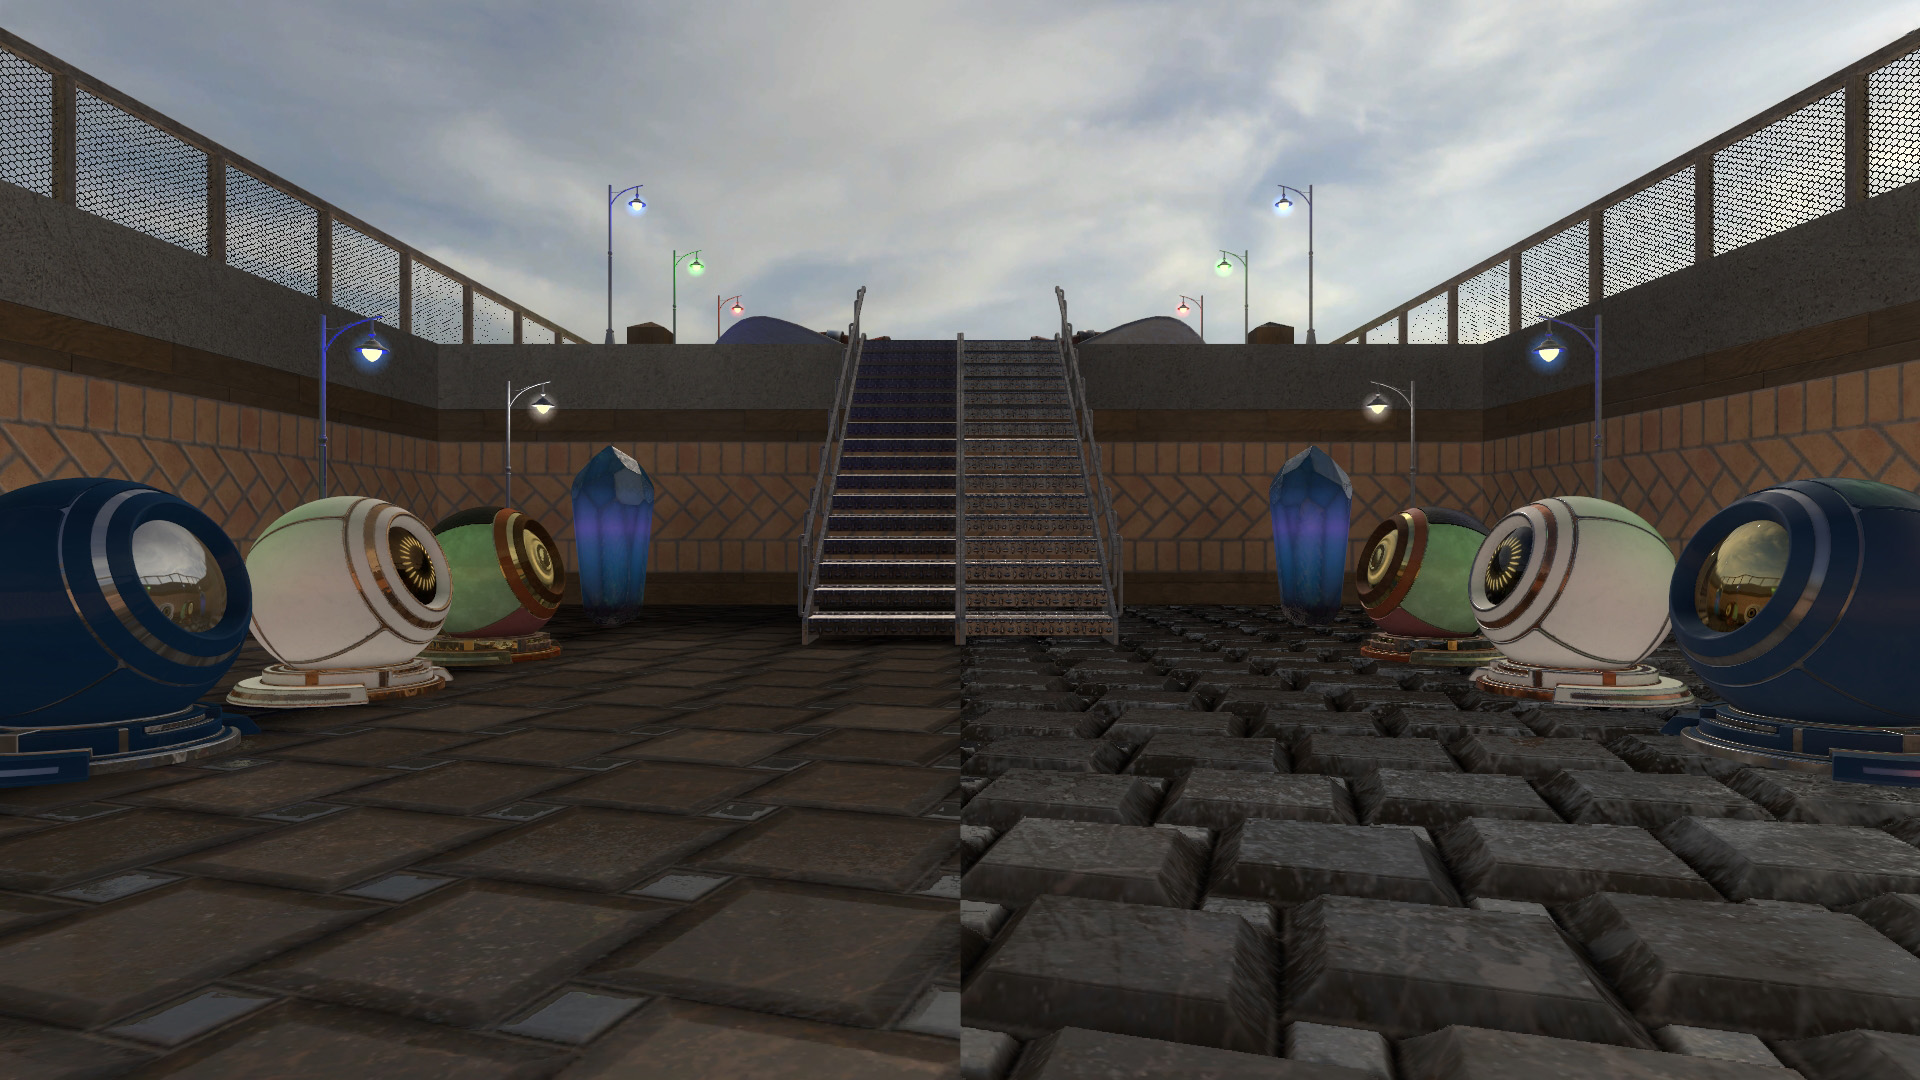
The Physically Based Rendering (PBR) shader is a powerful new shader that provides more realistic and versatile rendering of brushes and models within Momentum Mod whilst using fewer textures and needing fewer VMT tweaks.
PBR extends Source’s shading capacity by storing additional Metalness, Roughness and Ambient Occlusion maps in independent channels of an additional texture called the MRAO.
Additionally, it uses the alpha channel of the normal map as a height input for parallax maps.
This guide will be a general overview of its use and how to set up textures for it from scratch.
The original repo can be found on GitHub.
Prerequisites #
To make proper use of this Guide you should:
- Be on Momentum 0.8.4 or newer
- Be able to create PBR textures/work with the PBR Metal/Rough workflow
- Have either Substance Painter and/or Designer, and have some experience with them for making PBR textures from scratch
- Know how to create textures such as Ambient Occlusion via baking if you’re not using Substance Painter and/or Designer to create them instead
- Photoshop if you’re not using Substance Painter/Designer and already have PBR textures (Metallic, Roughness, AO) that you need to create an MRAO from
Not all tools are covered but hopefully this guide may help with the general process.
Since the PBR Shader uses the PBR workflow, most textures will have to be remade or otherwise edited to work properly.
VMT Example - Model #
Here is an example VMT, something you would use on a model:
PBR
{
	$basetexture "models\props\pbr_asset_d"
	$mraotexture "models\props\pbr_asset_mrao"
	$bumpmap "models\props\pbr_asset_n"
	$emissiontexture "models\props\pbr_asset_e"

	$envmap "env_cubemap"
	$model "1"
}
$basetexture will be the Base Colour texture.
$mraotexture will be the MRAO texture.
$bumpmap will be for the Normal texture.
$emissiontexture will be for any glowing sections of the model.
The emission texture is a colour texture, not a mask.
$envmap should just be left as env_cubemap.
$model 1 must be added for models to work!
VMT Example - Brush #
Here is another example using parallax, intended for use on a brush:
PBR
{
	$basetexture "example\pbr_asset_d"
	$mraotexture "example\pbr_asset_mrao"
	$bumpmap "example\pbr_asset_n"

	$envmap "env_cubemap"
	$parallax "1"
	$parallaxdepth "0.03"
	$parallaxcenter "0.0"
}
The parallax option requires that a height map is embedded into the alpha channel of the normal map.
You can check out one way of doing so below.
$parallax simply enables the parallax effect.
$parallaxdepth specifies how ‘deep’ the parallax effect will go.
$parallaxcenter adjusts the centre-point of the parallax effect, nudging it closer or further away from the surface.
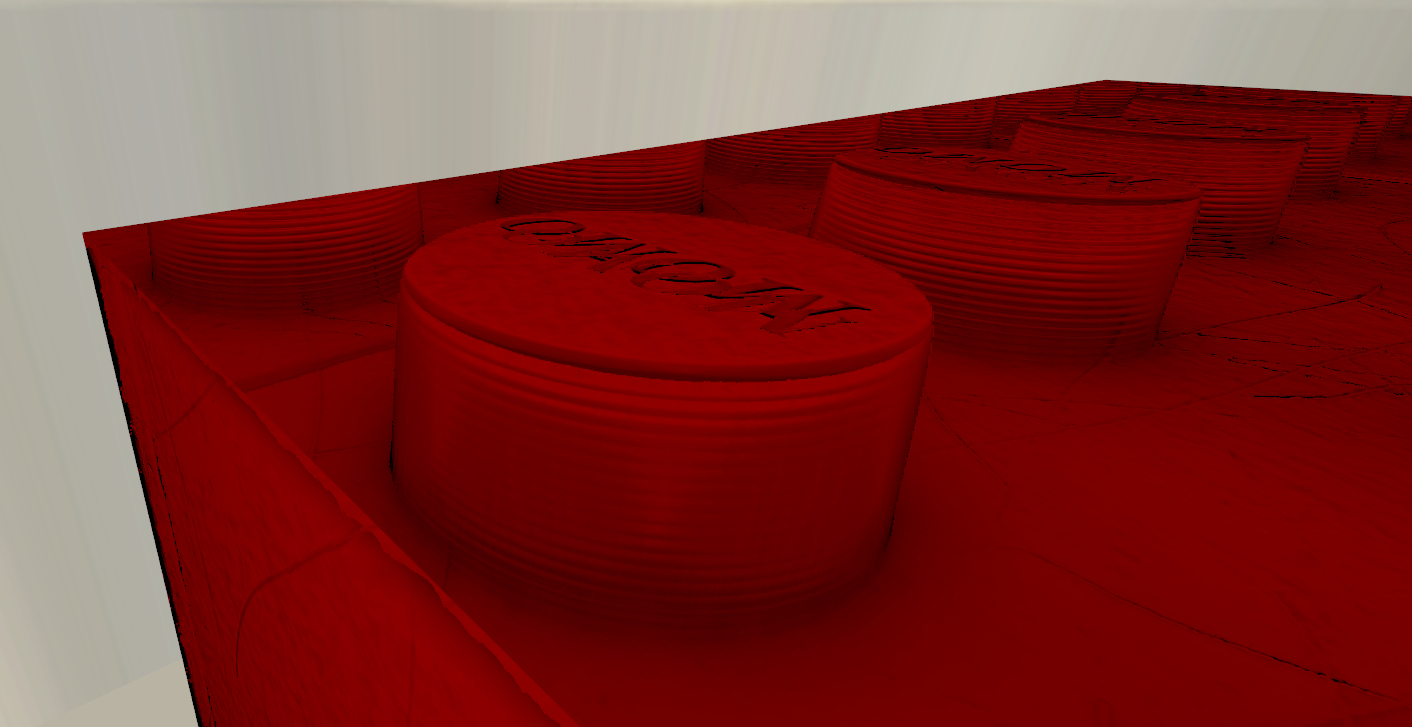
Parallax Occlusion has its limitations and things to be wary of. The parallax shader has a limited number of layers to create the depth effect.
If you make the height value too intense, these layers become very easy to notice and ruin the effect, as shown below.
Texture Creation - Painter #
When starting a new project in Painter, you should be fine using the standard PBR - Metal Roughness template.
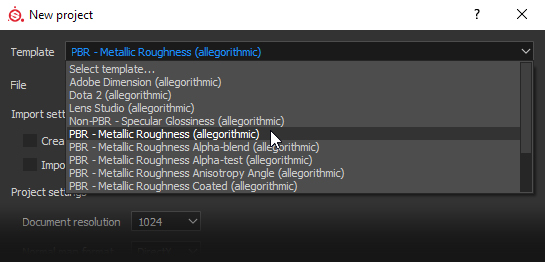
However, the PBR shader uses MRAO textures, so a custom export template is needed otherwise the channels must be packed together into a single texture elsewhere.
You can try this export template, which creates the MRAO texture as well as an Emissive texture if one exists:
This template does not include the height map in the normal map alpha for parallax.
It can go in the Allegorithmic\Substance Painter\shelf\export-presets folder.
Texture Creation - Designer #
Creating the input textures isn’t covered in the guide - this section simply shows how to composite both the MRAO and normal map with the height textures correctly.
You can create a MRAO texture by putting the Metalness, Roughness, Ambient Occlusion, and a White Uniform Color Node into an RGBA Merge Node.
The normal map with height embedded is simpler and can be achieved with an Alpha Merge node.
Both processes are shown below. The MRAO is colour-coded to make it easier to follow:
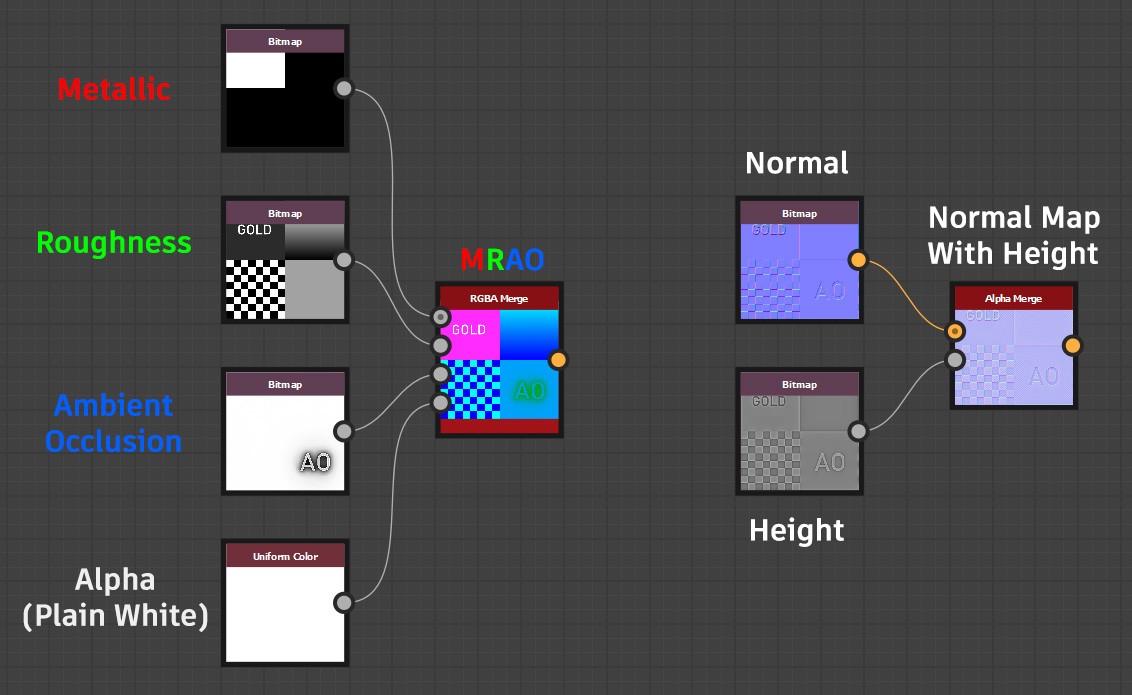
You should then have the 3 minimum textures needed for the shader.
Manual MRAO Creation in Photoshop (Channel Packing) #
If you have several textures you want to create an MRAO from and you don’t have Substance Designer, you can create it manually in something like Photoshop.
The process is simple; you just need all 3 textures required to make an MRAO. The end result should look somewhat similar to this:
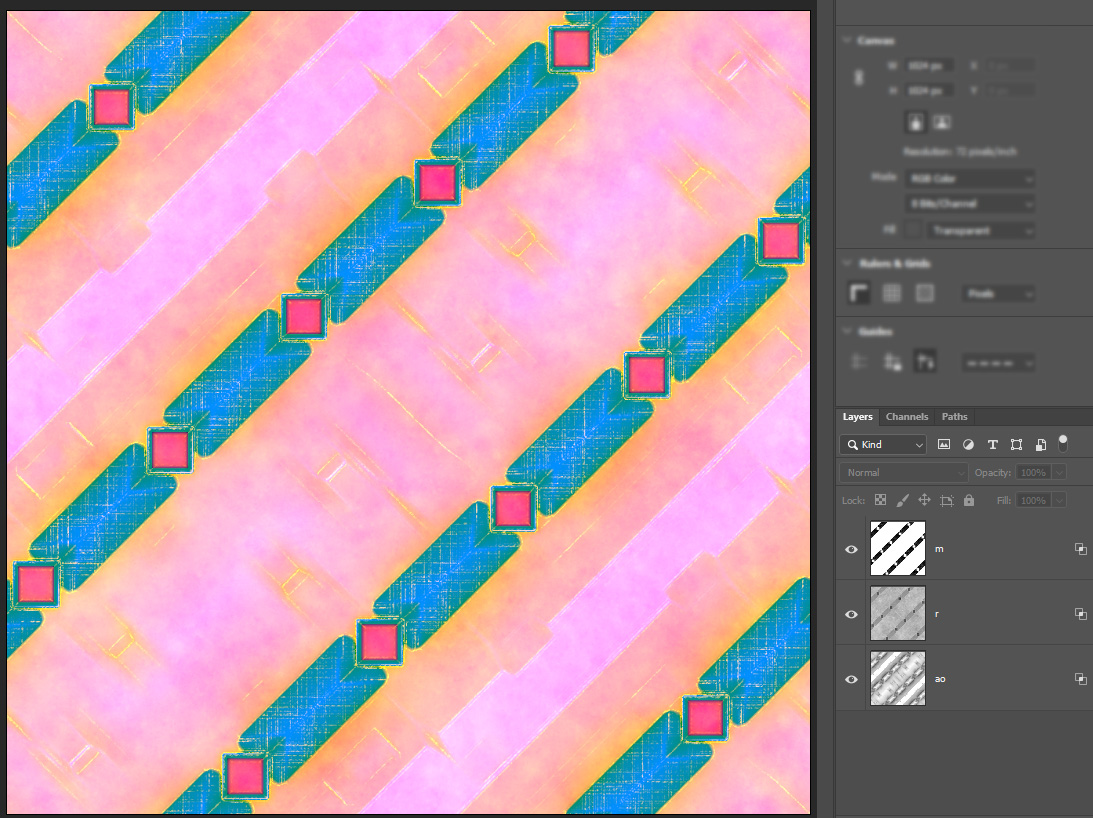
The only layers you need are those of the 3 textures; add them all, check their properties, and look for these checkboxes:
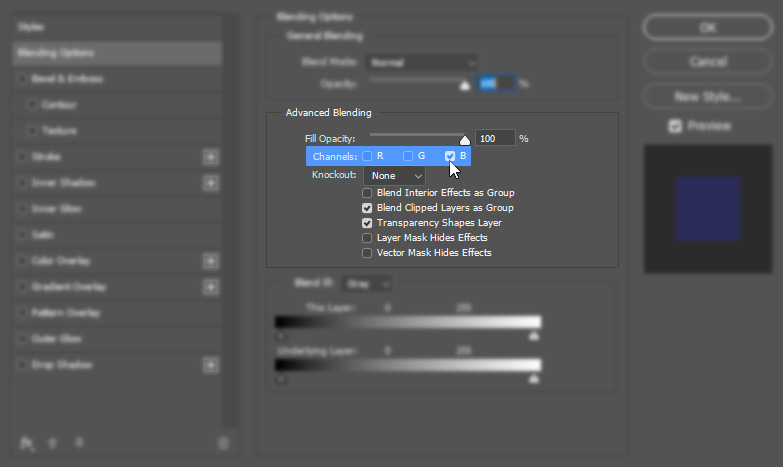
By default, all 3 of these are checked, which is normal. Depending on which texture layer you’ve selected, change the checkboxes to the following:
Metallic:
- R Checked
- G Unchecked
- B Unchecked
Roughness:
- R Unchecked
- G Checked
- B Unchecked
Ambient Occlusion:
- R Unchecked
- G Unchecked
- B Checked
Afterwards, you should have a strange, but colourful looking image that you can save and make use of with the PBR shader.